ST 4U 121: Adding a Post Editor
Today's Smalltalk 4 You continues the VA Smalltalk Seaside tutorial with a posting tool. That gets us into flow control using #show:onAnswer:, as we need to know whether a post was submitted or cancelled on the new form we'll create today. If you have trouble viewing it here in the browser, you can also navigate directly to YouTube. To watch now, click on the image below:
If you have trouble viewing that directly, you can click here to download the video directly. If you need the video in a Windows Media format, then download that here.
You can also watch it on YouTube:
Today we'll start making use of the login UI and custom session by creating a posting tool for the blog server. We'll be following the same pattern of development we did for the Login UI; that also means that we'll be looking at #show:onAnswer: in more depth today. Last time we used it in more or less the simplest case (i.e., we threw away the answer). Today we'll be doing more normal application flow control. To get started, define a new subclass of WAComponent:
WAComponent subclass: #BlogPostView
	instanceVariableNames: 'post'
	classVariableNames: ''
	poolDictionaries: ''
Next, we need to define a new component that will be used to login - BlogLoginView. This will be a second entry point into the application, but only for authorized users. Today, we'll be setting it and the custom session up:
WAComponent subclass: #BlogLoginView
	instanceVariableNames: 'user'
	classVariableNames: ''
	poolDictionaries: ''
We'll need to initialize any new instances of the post tool - we want them to hold an instance of BlogPost:
initialize
	"Initialize a newly created instance. This method must answer the receiver."

	super initialize.
	post := BlogPost new.
The control flow we'll set up with rendering will be a lot like the login UI< but we'll have to pay attention to the answer value this time:
renderContentOn: html
	html form: [
		html table: [
			html
				tableRow: [self renderTitleFieldOn: html];
				tableRow: [self renderContentFieldOn: html];
				tableRow: [self renderOwnerFieldOn: html];
				tableRow: [self renderButtonsOn: html]]]

renderTitleFieldOn: html
	html
		tableData: [html text: 'Title: '];
		tableData: [html textInput on: #title of: self post]

renderContentFieldOn: html
	html
		tableData: [html text: 'Content: '];
		tableData: [html textArea on: #content of: self post]

renderOwnerFieldOn: html
	html
		tableData: [html text: 'Owner: '];
		tableData: [html textInput on: #owner of: self post]

renderButtonsOn: html
	html
		tableData;
		tableData:
			[html submitButton
				callback: [self answer: true];
				value: 'Save'.
			html submitButton
				callback: [self answer: false];
				value: 'Cancel']
Notice how we send back an answer object (a boolean) in the callbacks. That makes the post tool operate a lot like a UI dialog with an accept and
initializeMenuComponent
	menuComponent := BlogMenuView new.
	self session currentUser ifNotNil: [menuComponent addEntry: 'New Post' withAction: [self addPost]].
	menuComponent addEntry: 'All Posts' withAction: [self allPosts].
	menuComponent addEntry: 'Today''s Posts' withAction: [self todaysPosts].
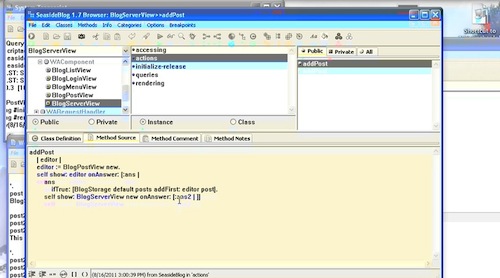
The action for this link is #addPost - here's that method:
addPost
	| editor |
	editor := BlogPostView new.
	self show: editor onAnswer: [:ans |
		ans
			ifTrue: [BlogStorage default posts addFirst: editor post].
		self show: BlogServerView new onAnswer: [:ans2 | ]]
This is where we make use of the non-continuation control flow. We use #show:onAnswer: to move to the post tool, and we provide an answer block that examines the answer. On true, it saves the post. We don't worry about false, because either way, we proceed back to the main post view. That's all there is to flow control in Seaside when you aren't using Continuations. In many respects, it's a lot simpler.
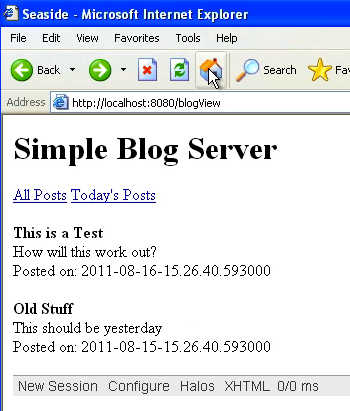
Let's take a look at how the changes operate. First, this is the main view when we didn't login. Notice the lack of the posting option:
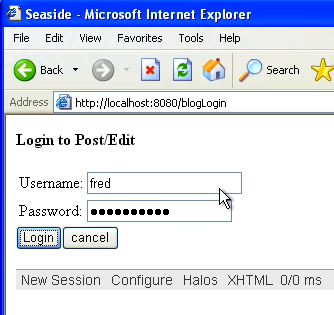
Now we'll go to the login UI and login:
That takes us back to the main view, but now we show our new posting option:
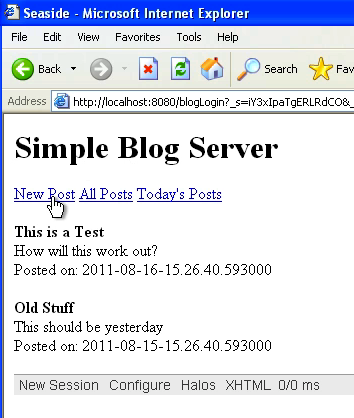
Follow that link:
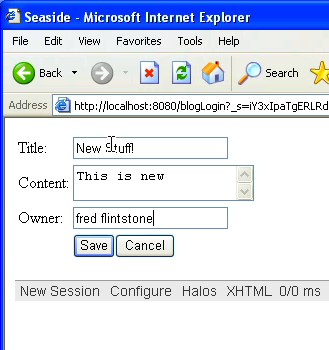
Now add the post and save it - you should see something like this:
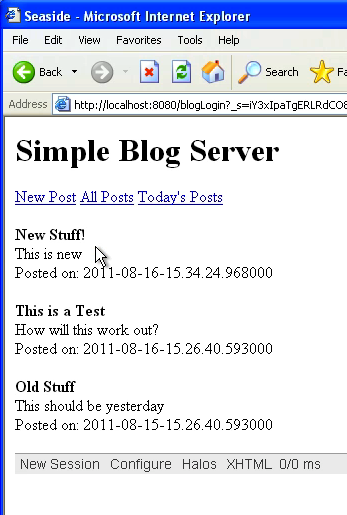
That's it for today - but we've now seen how flow control works when using Seaside in VA Smalltalk.
Need more help? There's a screencast for other topics like this which you may want to watch. Questions? Try the "Chat with James" Google gadget over in the sidebar.
Technorati Tags: smalltalk, va smalltalk, seaside
Enclosures:
[st4u121-iPhone.m4v ( Size: 7258281 )]
 .
.


