. .

tutorial

Using the Smalltalk Facebook Interface

February 24, 2010 15:51:00.824

I've seen a few questions pop up on getting started with the Facebook interface I wrote, so I thought I'd post a basic "getting started" tutorial. First off, you need to go to the Facebook website (developer pages) and create an application definition - you'll get your application keys (you'll need those to make any Facebook API callls).
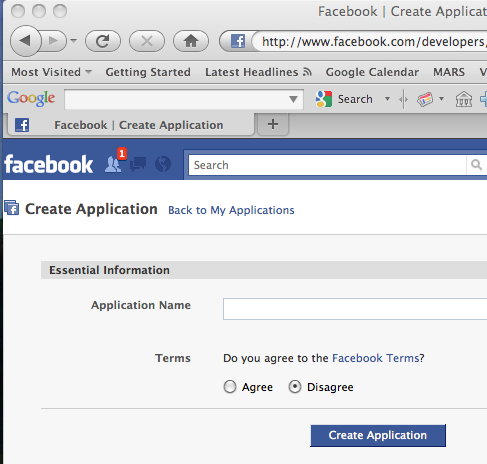
Once you've done that, start VisualWorks 7.7 (or ObjectStudio 8.2) and load the FacebookBundle from the public store repository.

Once you've done that, you need to execute the following code (use a workspace for now) with your application credentials:


"login"
holder := FacebookSecretHolder new
		apiKey: apiKey;
		secretKey: secret;
		applicationId: appId.

"now get the connection (will spawn a web browser"
connection := Connection withSecretHolder: holder.
connection login.

At the end of that, your default browser should pop up - it may show you what's below, or it may prompt you to login:
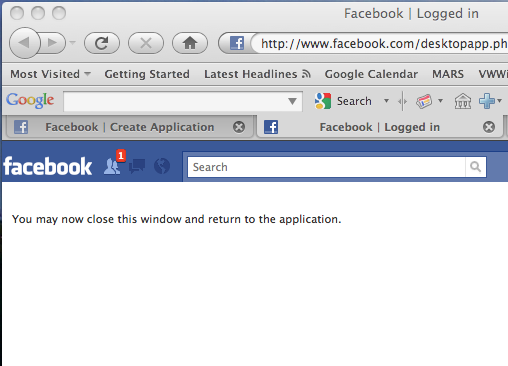
Once you've logged in, execute the following code to start a session:


"get auth token"
connection authGetSession.

At this point, you can start using the API - but you may notice that some calls don't work as you expect. For instance, #getStream will only return your news updates, and trying to publish to the news stream (#streamPublish:) will fail. Why? Well, your application needs to have permissions granted. Execute the following code, which will spin your browser back up, prompting you to authorize the relevant permissions:


"only need to ask for these authorizations once - grants permission to read news feed
and to write to the news feed"
connection grantExtendedPermissionFor: 'read_stream'.
connection grantExtendedPermissionFor: 'publish_stream'.

As the comment notes, you only need to do that once. Not once per session, once, period - unless Facebook changes something, or you use the APIs (or website) to revoke the granted rights. Now, use this to read the stream (inspect the results), and then publish an update:


"now read the news feed"
connection streamGet.


"update status in stream"
connection streamPublish: 'Writing to my Facebook news stream from Smalltalk!'.

Use the browser to verify that it all worked. That's pretty much it - to disconnect your session, use the code below:


"logout"
connection clearSession

You should be good to go. If anything seems wrong, just let me know

Technorati Tags: , ,

posted by James Robertson

 Share Tweet This

tutorial

Working with Silt

February 12, 2010 23:52:31.955

I have recieved a few questions about Silt recently, so I cleaned up the blog creation tool some (it could still use some work), and I added some basic documentation to the bundle comment. If you want to try the system out, here's what you do:

You can change the css references in View.ssp to use any of the CSS templates that come down with the installation; you could derive a new one based on them as well, using the same API that View.ssp uses. Alternatively, you can set things up any way you want using the API in class BlogSaver. For example:


blog := BlogSaver named: 'blog'.

"get all recent posts"
recentPosts := blog fetchAllRecentPosts.

"get all recent posts for a category"
recentInCategory := blog fetchBlogsbySearchCategory: someCategory

"get the most recent N posts in a category"
recentInCategory := blog fetchBlogs: howMany bySearchCategory: someCategory

"get a specific post by entry ID"
blogPost := blog entryFor: entryID

"get most recent post"
lastPost := blog blog fetchAllRecentPosts first.

To learn more about the API, look at class BlogSaver, specifically, the api categories

The server also manages "static" pages; you can create one using the administration pages. It will land in a directory named 'blog/content', where 'blog' is the name you used when you set the site up. If you edit the resulting file by hand, you'll need to tell the server that it's been changed (if you edit with the tools, it'll get handled for you). To reset by hand:


blog (Blog.BlogSaver named: 'blog') cache clearHTMLCaches.

Finally, if you want WYSIWYG online editing, you need to install TinyMCE. Download that here, and install it on your server. Edit the file editor.inc to reflect the proper location.

Technorati Tags: , ,

posted by James Robertson

 Share Tweet This

tutorial

Cairo Graphics: Getting Started

February 5, 2010 13:54:43.463

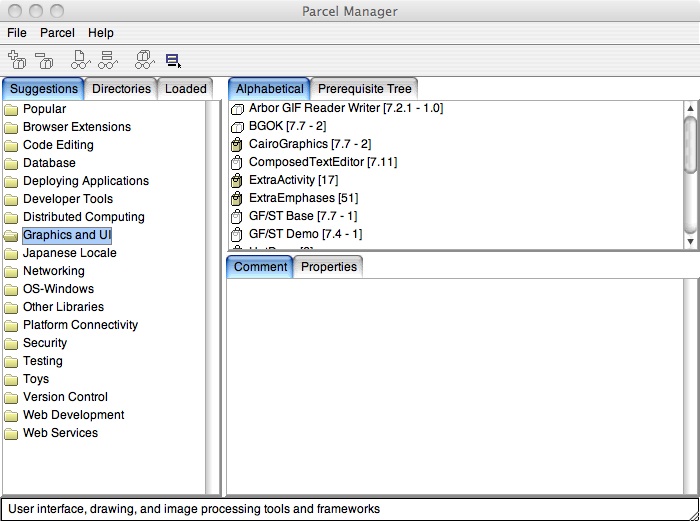
Next week I'll be redoing some of the Cairo screencasts - they are all outdated, simply due to the fact that you can load cairo much more easily now:

On Windows and OS X, you'll have the shared libraries installed as well (assuming you picked those when you ran the installer. If you didn't, re-run the installer and do so). For Linux or Unix platforms, you'll have to get Cairo installed yourself.

Once you have it loaded, try this as a simple "Is Cairo Working" test:


| win component |
win := ApplicationWindow new.
win
	component: (VisualBlock block: 
					[:gc :box |
					gc newCairoContextWhile: 
						[:cr |
						cr
							source: ColorValue red;
							rectangle: (box insetBy: 20);
							fillPreserve;
							source: ColorValue blue;
							strokeWidth: 20;
							stroke]]).
win open.

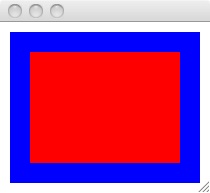
If it worked, you should get this (make the window bigger to see it:

Technorati Tags: , ,

posted by James Robertson

 Share Tweet This

tutorial

RESTful Services in Seaside

February 2, 2010 8:19:03.557

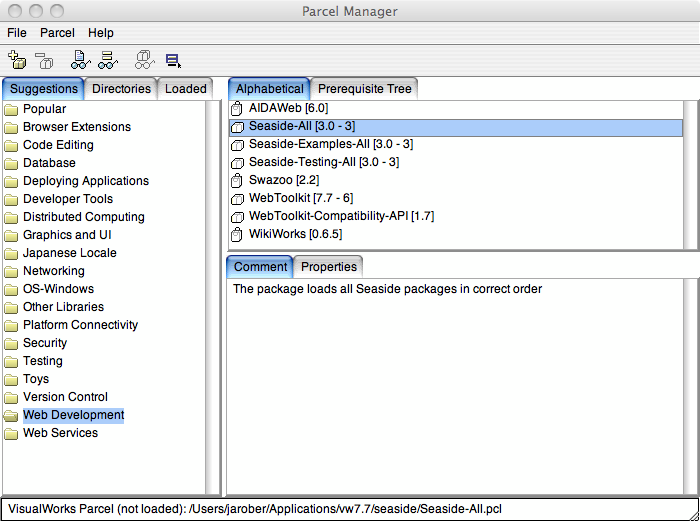
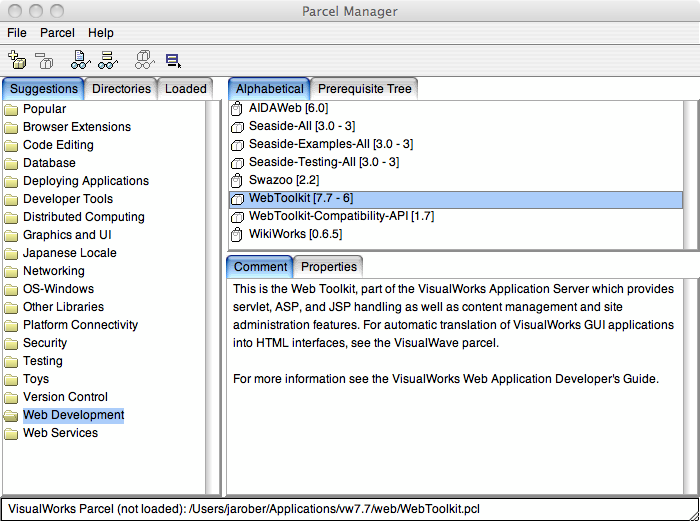
Over the weekend, I demonstrated a RESTful JSON service using the WebToolkit. Today, I'm going to do the same thing using Seaside 3.0 in VisualWorks (the same code should work in ObjectStudio). If you want the code, here it is. First, load Seaside from the Parcel Manager - it's now under "Web Development":

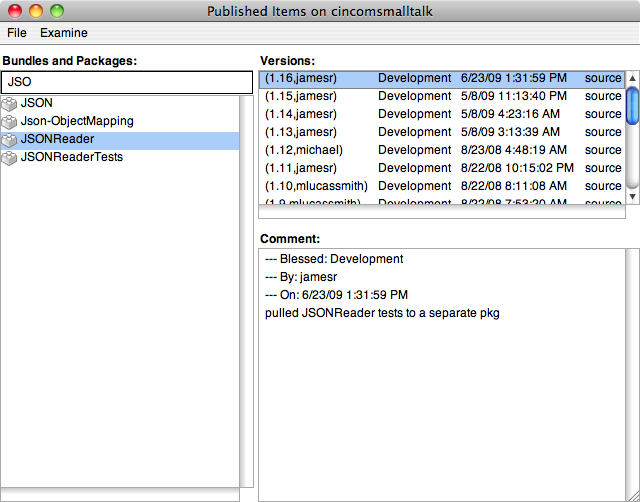
The example I'm building uses JSON (although it could just as easily be XML or anything else) - so we'll connect to the public store and get the JSON code support:

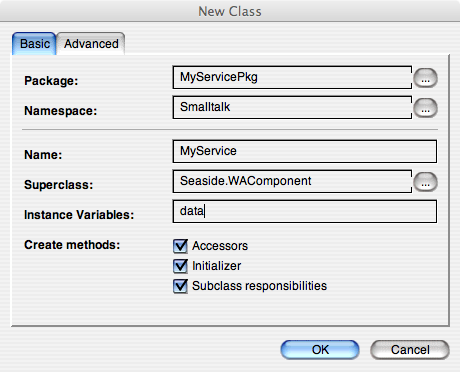
Next, we'll create a subclass of WAComponent that will render the JSON for us. As I did over the weekend, I'll just create a simple dictionary for the example:

Next, we need to write some code. Add the following two class methods:


canBeRoot
	^true


initialize
	"MyService initialize"

	self registerAsApplication: 'SvcPoint'.

In a workspace, execute MyService initialize. At this point, you have a working service, it just doesn't do anything. Go to the launcher and pull down the Seaside menu and start the server. If you go to SvcPoint, you should get a blank page.

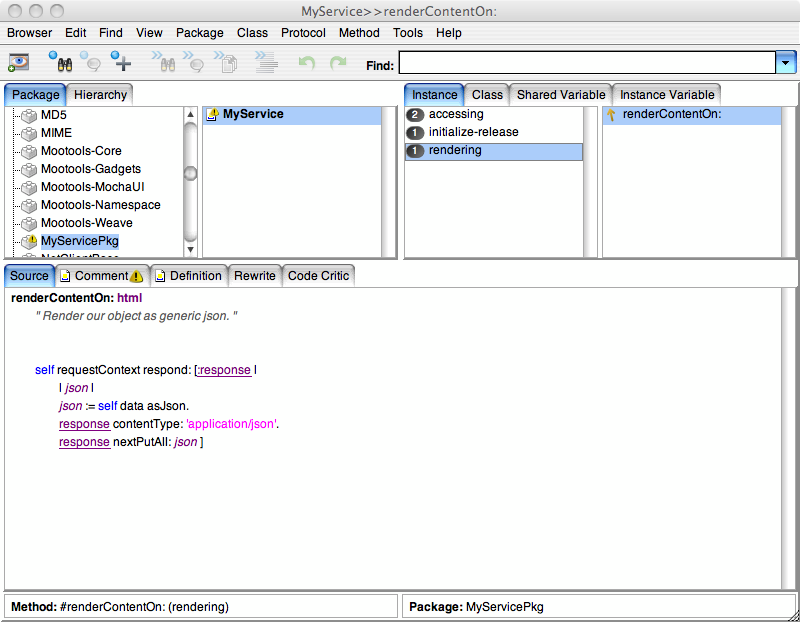
Now, you need to create the rendering code to respond with JSON. This is a bit different than it would have been in Seaside 2.8 - the session and request context code have changed.

Write the code above:


renderContentOn: html
	" Render our object as generic json. "


	self requestContext respond: [:response | 
		| json |
		json := self data asJson.
		response contentType: 'application/json'.
		response nextPutAll: json ]

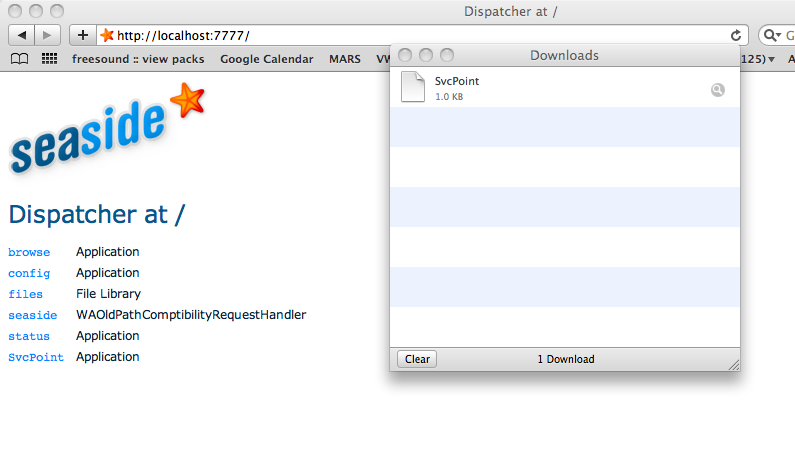
Now browse the entry point again - you should be prompted to download a file (or it'll just download, depending on the browser you're using):

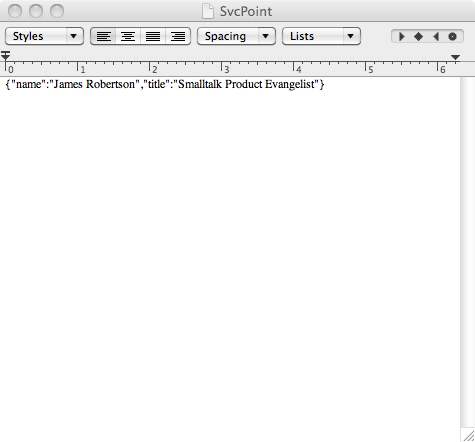
Finally, if you open that response file in a text editor, you should see this:

And that's it! You now have a RESTful service implemented in Seaside. Here's the code in a zip file if you just want to load it and take a look.

Technorati Tags: , , ,

posted by James Robertson

 Share Tweet This

tutorial

A RESTful Web Service in Smalltalk

January 31, 2010 12:22:55.518

I got a question via Twitter earlier today about creating a RESTful web service in Smalltalk - I'll do a screencast on this tomorrow, but I thought a quick walkthrough might be useful as well. This example uses the VisualWorks Web Toolkit (which would also work in ObjectStudio) - I'll create a Seaside based example later this week.

Want the code? You can grab that here.

So: step one, load the Web Toolkit - right click and select "Load" after getting the Parcel Manager open:

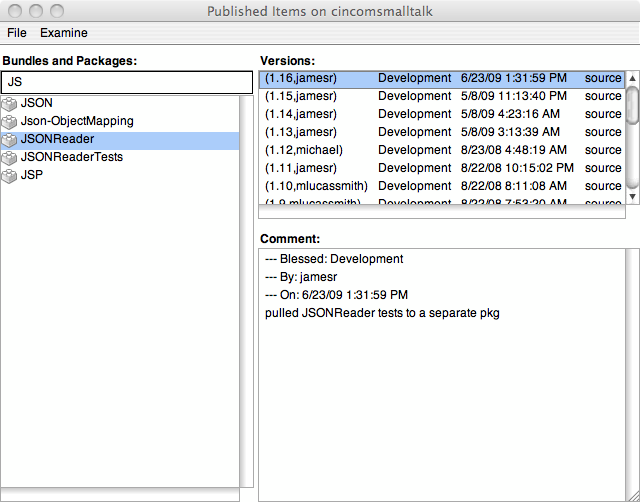
Once that's in, connect to the public store repository, and load JSONReader - that's just what I'm using in this example. You could just as easily answer an XML document using the SAX driver, or some other format entirely. Anyway, load this via a right click on the latest version:

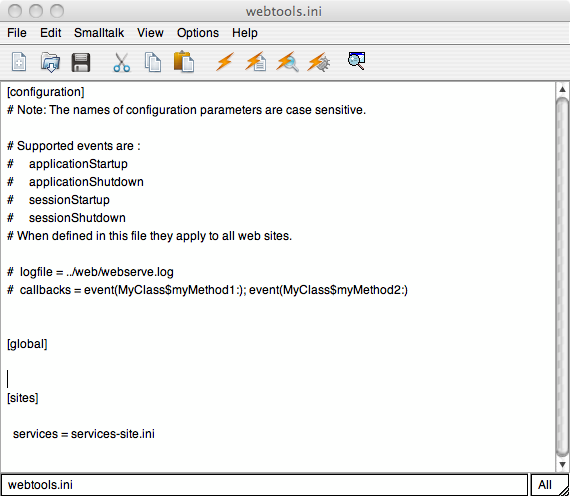
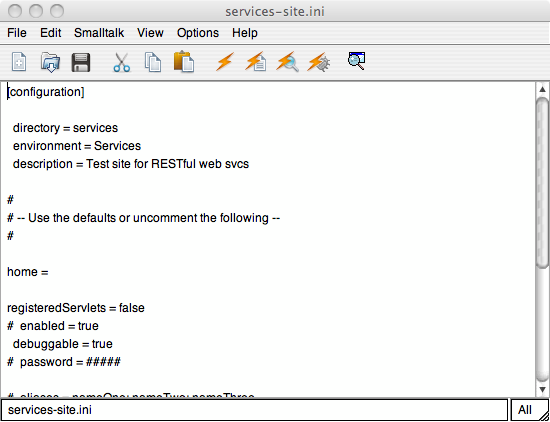
Next, you need to create a "site definition". You don't need to do this for each service; just for each named site (path) you want to support. You'll have two files: webtools.ini (copy that over from the $(VISUALWORKS)/web directory and edit it), and services-site.ini. The name of the latter file is whatever you want to call it, so long as you reference it in webtools.ini:

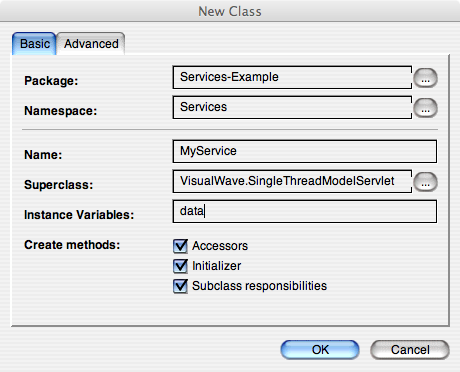
Now you can create your new service. Define a subclass of SingleThreadModelServlet:

I added the data instance variable just to have something to respond with. The superclass I'm using ensures that each request will spawn a new instance (thus sharing no data) instead of assuming a stateless model. Next, add these two methods:


initialize
	"Initialize a newly created instance. This method must answer the receiver."

	super initialize.
	data := Dictionary new.
	data at: 'name' put: 'James Robertson'.
	data at: 'title' put: 'Smalltalk Product Evangelist'.


doGet
	"entry point for this service"

	| content |
	response contentType: 'application/json'.
	response status: 200.
	content := self data asJson.
	response contentLength:  content size.
	response write: content

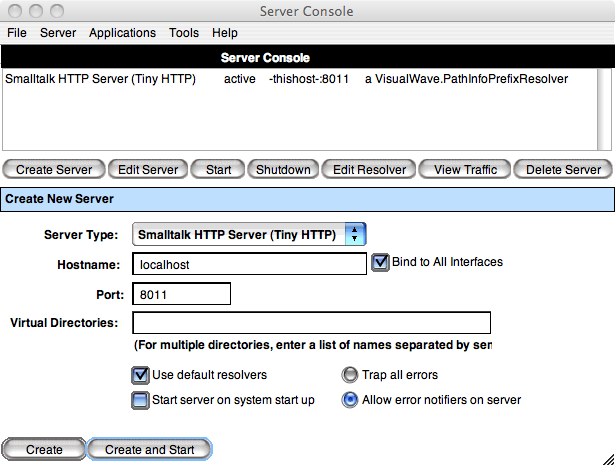
Finally, define a listener so that you can make requests. In the launcher, over on the far right is a button for doing that. Press that, then create the listener (on any available port), and click Create and Start:

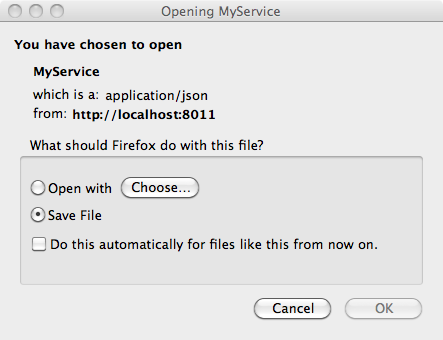
I put that on port 8011, so using this url: http://localhost:8011/services/servlet/MyService, I should get this (I'm using Firefox):

If you use some application that expects JSON, you'll get the actual object. And that's it - having the service read from a database (etc) is just a detail - the actual RESTful part is pretty easy. Questions? Send them here.

Want the code? You can grab that here.

Technorati Tags: , , , ,

posted by James Robertson

 Share Tweet This

Previous (15 total)