ST 4U 124: Using Scriptaculous with Seaside
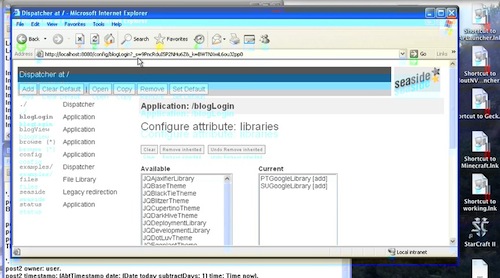
Today's Smalltalk 4 You continues the VA Smalltalk Seaside tutorial with Ajax. We'll change the filtering links on the main view to update using Javascript rather than a full page submit. Today we'll do that using Scriptaculous; in the next tutorial, we'll use JQuery. If you have trouble viewing it here in the browser, you can also navigate directly to YouTube. To watch now, click on the image below:
If you have trouble viewing that directly, you can click here to download the video directly. If you need the video in a Windows Media format, then download that here.
You can also watch it on YouTube:
In this section we'll add Ajax to our Seaside application. Today we'll use Scriptaculous - in the next tutorial, we'll use JQuery. The configuration and code for both are largely the same, and so far as the end user of your applications is concerned, things behave the same way.
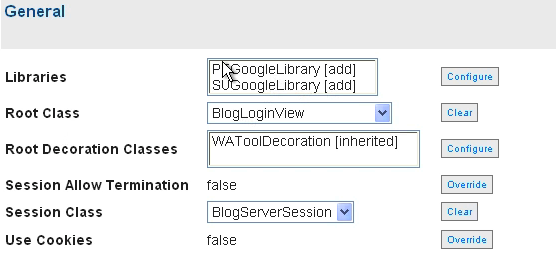
First, we need to go back into the configuration screens (as we did for the custom session work). We'll need to do the same thing for both the blogView and blogLogin entry points we've defined. Scroll down in the configuration section to libraries, and select configure. In the image below, I've already added the two libraries in question; your listbox will be blank:

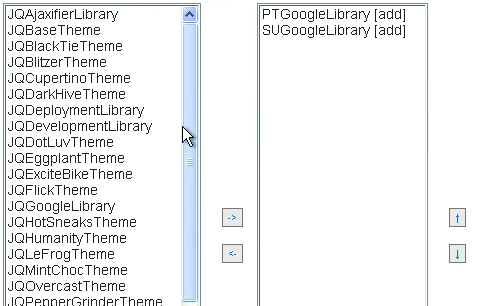
Select PTGoogleLibrary (Prototype) and SUGoogleLibrary (Scriptaculous) on the left - use the arrow button to move them to the right:

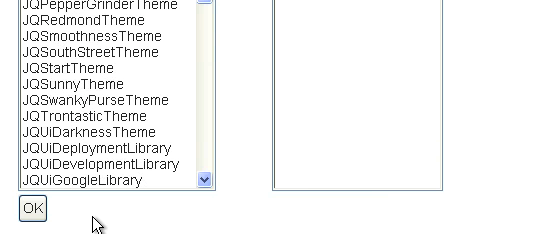
Now scroll down to the Ok button to apply the change, and then repeat the process for the other entry point:

Now we need to get into the code that will use these libraries that we just ensured will be loaded. First, we'll redefine BlogMenuView to hold a reference to the list component - so that when links are clicked, we can direct the list component to re-render without forcing a full page submit:
WAComponent subclass: #BlogMenuView
    instanceVariableNames: 'entries listComponent '
    classVariableNames: ''
    poolDictionaries: ''
We'll also need to change the #initializeMenuComponent method in BlogServerView to set that up:
initializeMenuComponent
	menuComponent := BlogMenuView new.
	self session currentUser ifNotNil: [menuComponent addEntry: 'New Post' withAction: [self addPost]].
	menuComponent addEntry: 'All Posts' withAction: [self allPosts].
	menuComponent addEntry: 'Today''s Posts' withAction: [self todaysPosts].
	menuComponent listComponent: listComponent
Now we'll change the way #renderContentOn: works, so that it renders the filtering links as ajax enabled links:
renderContentOn: html

	self entries
		do: [:each |
			(each key = 'New Post')
				ifTrue: [self renderStandardLinkOn: html for: each]
				ifFalse: [self renderAjaxLinkOn: html for: each]]
		separatedBy: [html space]
The #renderStandardLinkOn:for: method looks a lot like the above method used to look; the changes are in #renderAjaxLinkOn:for:
renderStandardLinkOn: html for: entry
	"Render this component"

	html anchor
			callback: entry value;
			with: entry key

renderAjaxLinkOn: html for: entry
	"Render this component"

		html anchor onClick:
			(html updater
				id: 'listid';
				callback: [:renderer | self listComponent updateFilterFrom: entry key.
							renderer render: self listComponent]);
			url: '#';
			with: entry key
Note the #onClick: method - it sets up the link to use Javascript. The #updater method is how we hook in Scriptaculous. The callback here is a block, and that's where we take advantage of the link to the list component - we tell it to re-render within the named div on click. The last thing we need to do is add #updateFilterFrom: to the BlogListView class, so that the updater can reset the filter just before it re-renders:
updateFilterFrom: filterName
	filterName = 'All Posts'
		ifTrue: [self setAllPostsFilter]
		ifFalse: [self setTodaysPostsFilter]
That's all the code we need - now just open the blogView interface in your browser, and switch between the two filters (all and today) - you should see them updating without a full page submit. Next time, we'll redo this to use JQuery
Need more help? There's a screencast for other topics like this which you may want to watch. Questions? Try the "Chat with James" Google gadget over in the sidebar.
Technorati Tags: smalltalk, seaside, va smalltalk, ajax
Enclosures:
[st4u124-iPhone.m4v ( Size: 7010457 )]
 .
.