ST 4U 118: Custom Sessions in Seaside
Today's Smalltalk 4 You continues the VA Smalltalk Seaside tutorial with the addition of a custom session handling class. We'll be using it for our login support in the blog server. You can download the initial domain model as a file out here. If you have trouble viewing it here in the browser, you can also navigate directly to YouTube. To watch now, click on the image below:
If you have trouble viewing that directly, you can click here to download the video directly. If you need the video in a Windows Media format, then download that here.
You can also watch it on YouTube:
In this section, we'll add a custom session, a login screen that uses that session, and learn how to configure our Seaside application to use that custom session. Eventually, we'll be making use of this session class to manage login (to use the not yet created post editor) - but first things first - we need to add to the pre-requisites for our application. Unless we add SeasideSessionApp to that list, we won't be able to define a subclass of WASession:
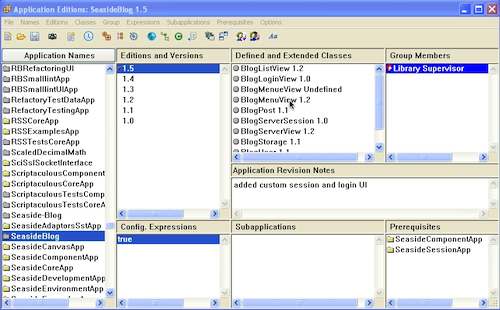
Next, we need to define our new WASession subclass:
WASession subclass: #BlogSession
	instanceVariableNames: 'currentUser'
	classVariableNames: ''
	poolDictionaries: ''
Next, we need to define a new component that will be used to login - BlogLoginView. This will be a second entry point into the application, but only for authorized users. Today, we'll be setting it and the custom session up:
WAComponent subclass: #BlogLoginView
	instanceVariableNames: 'user'
	classVariableNames: ''
	poolDictionaries: ''
We'll need to initialize new instances of our login component:
initialize
	super initialize.
	user := BlogUser new.
And now we'll see how easy it is to do form handling in Seaside:
renderContentOn: html
	html div
		class: 'login';
		with: [html paragraph: [html strong: [html text: 'Login to Post/Edit']].
				html form: [html table: [html tableRow: [self renderUsernameOn: html].
							html tableRow: [self renderPasswordOn: html]].
						self renderButtonsOn: html]]

renderUsernameOn: html
	html
		tableData: [html text: 'Username: '];
		tableData: [html textInput on: #username of: self user].


renderPasswordOn: html
	html
		tableData: [html text: 'Password: '];
		tableData: [html passwordInput on: #password of: self user].

renderButtonsOn: html
	html div with:
		[html submitButton
			callback: [self validateLogin];
			value: 'Login'.
		html submitButton
			callback: [self call: BlogServerView new];
			value: 'cancel']

validateLogin
	| userOrNil |
	userOrNil := BlogStorage default users
		detect: [:each | each username = self user username and: [each password = self user password]]
		ifNone: [nil].
	self session currentUser: userOrNil.
	self call: BlogServerView new.
There's a lot going on in that small number of methods. First, look at how we split the rendering up - much as you might in a classic UI app. Second, note that we have callbacks set up (using blocks) for the functions (buttons) - again, a lot like a classic UI app. Finally, note that we can treat the ok/cancel pattern the same way here that we would in a classic UI. That's one of the nicer things about Seaside - constructing a basic UI is a lot like what you already know, except that you can bring in a CSS expert to make it look pretty :)
Now, before we can use the session class with our application, we need to configure things. Go to the main seaside launch page (port 8080 if you used the default port):
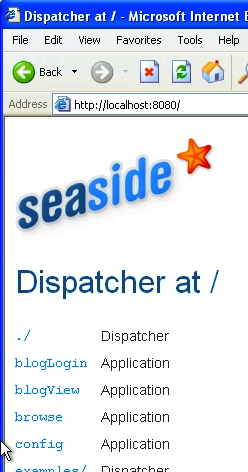
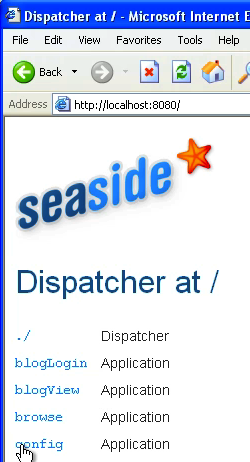
Select config on that screen:
Scroll down to the Session class section, and select the override button:
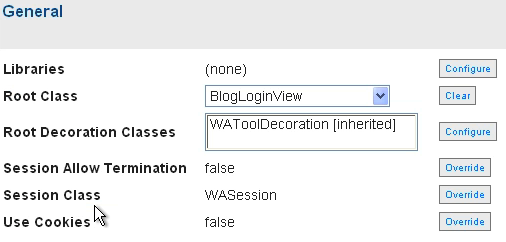
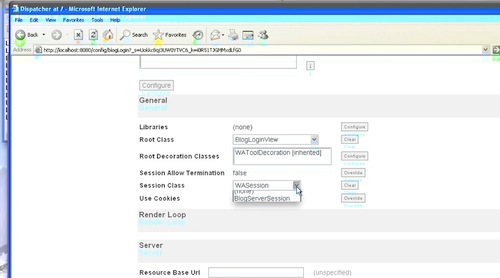
in the drop down menu, select the new session class we just created:

Finally, scroll all the way down to the bottom, and hit the Apply button. Now, do the same thing for the blogView interface, and you'll be using the new session. Note that we aren't doing anything with this session yet; we'll get to that soon.
Need more help? There's a screencast for other topics like this which you may want to watch. Questions? Try the "Chat with James" Google gadget over in the sidebar.
Technorati Tags: seaside, va smalltalk, tutorial
Enclosures:
[st4u118-iPhone.m4v ( Size: 10780193 )]
 .
.