ST 4U 106: Getting Started With WindowBuilder Pro
Today's Smalltalk 4 You looks at WindowBuilder Pro - one of the two main ways to build a user interface in VA Smalltalk. Today we'll paint a simple user interface for the Counter application we built previously; next time, we'll hook it up to that domain object. If you have trouble viewing it here in the browser, you can also navigate directly to YouTube. To watch now, click on the image below:
If you have trouble viewing that directly, you can click here to download the video directly. If you need the video in a Windows Media format, then download that here.
You can also watch it on YouTube:
Today we'll start looking at WindowBuilder pro in VA Smalltalk. It's one of two ways to build a UI in VA, the other being the PARTS tool. If you're an experienced Smalltalketr, WB Pro will probably be the best choice for you - it produces Smalltalk code that is easily worked with in the browsers, while PARTS is mostly an environment unto itself. Today we'll take an overview of the tool, building a UI that we'll use with the CounterApp demo - we'll hook the UI and domain model up in the next tutorial.
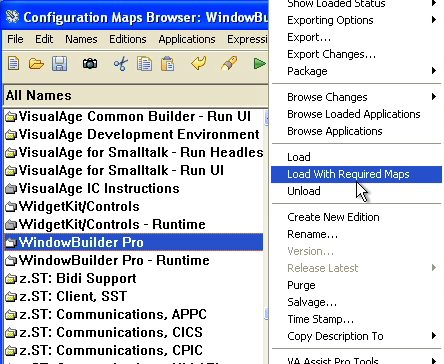
First, import WB Pro into ENVY - you can see a screencast that goes over how to import a library here - WB pro comes as a separate, loadable component from Instantiations. Once you have that in ENVY, just go to the Load Features tool and bring it in:
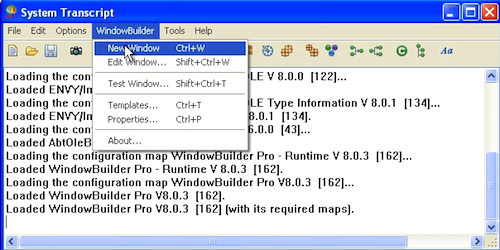
You should notice a new WindowBuilder menu on the launcher. Select New from that to start a new UI project:
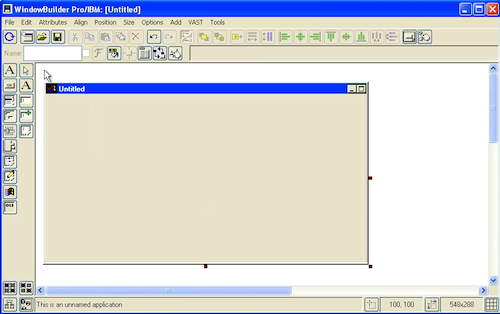
What you are looking at now is the blank canvas (which will hold your UI. On top are a selection of options for editing and controlling the layout of the widgets you place; on the left is a palette of widgets. It looks smaller than it is, because the left-most list is a category listing of widget types, while the right-most list holds the widgets for the type selected:
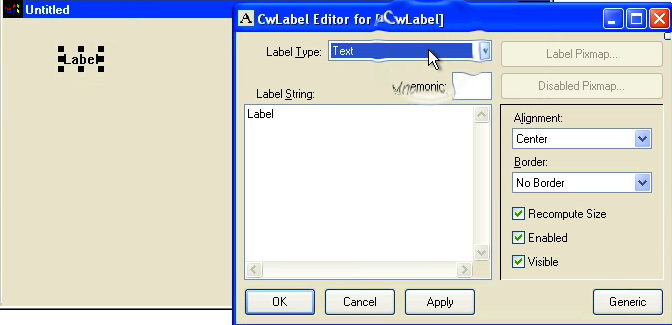
Now you can place widgets. Select a category - We've selected Text Widgets - and then a specific widget type. Then place the widget somewhere on the canvas. In this tutorial, we aren't going to worry about the layout, but you do have full control over that. Double click on the widget you placed to bring up the settable properties:
From the same category of widgets, select the Enhanced Text input field, place it, then double click to get its properties. Note that we can give it an initial value, and an editing type:
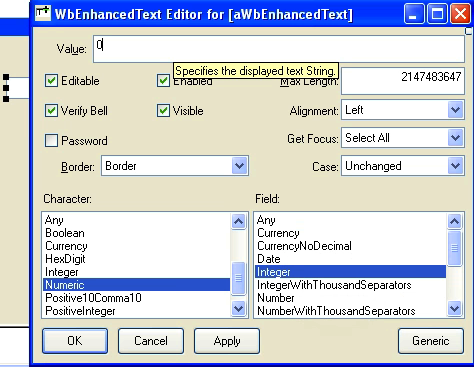
Do the same for the button, setting just the label - we'll cover callbacks in another tutorial, when we hook this UI up to a domain object. Finally, note that by double clicking on the window you are editing, you can set its properties:
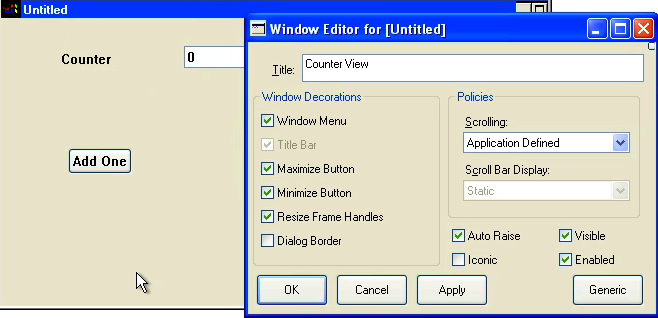
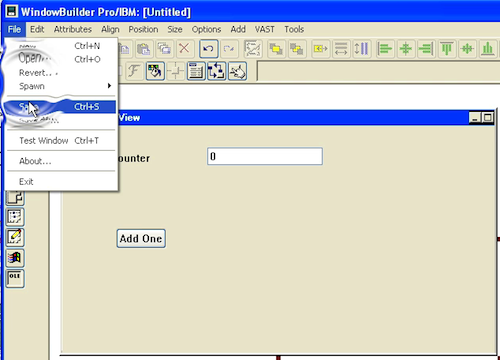
Now you need to save your work. You'll need to specify a class name and an application; pull down Save from the file menu in WB:
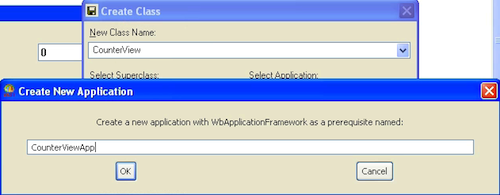
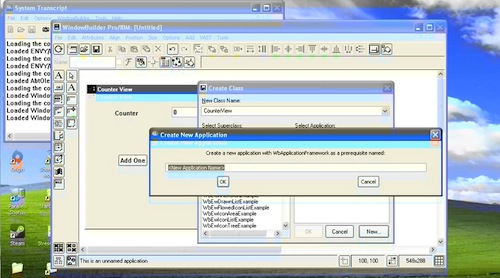
Now set the class and application name:
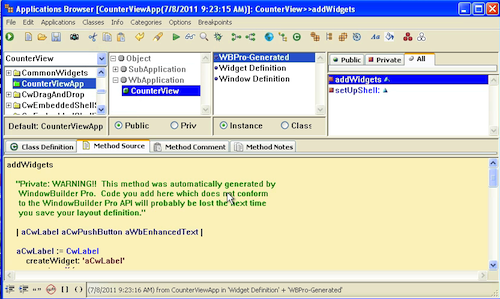
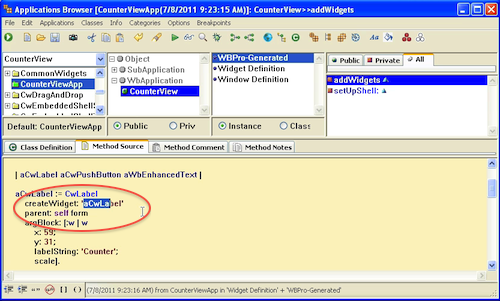
Now open up a browser, and select your new application. Select All in the protocol pane to see the generated methods. addWidgets is where all of your widgets get defined. You might think its odd that none of these are cached in instance variables, but it turns out (as we'll see in the next tutorial) that grabbing one of these widgets by name is easy - note the name in the second image below:
Need more help? There's a screencast for other topics like this which you may want to watch. Questions? Try the "Chat with James" Google gadget over in the sidebar.
Technorati Tags: smalltalk, va smalltalk, windowbuilder, UI
Enclosures:
[st4u106-iPhone.m4v ( Size: 7676815 )]
 .
.